NeuroPlatform Version 2#
This version of the neuroplatform is for now only for dedicated clients that are not using the shared access.
The interface and the code are slightly different from the version 1. Here is a small overview of how this version works. We will go through the visual interface, then the code and finally the database.
1- Intan interface#
Here is what the interface looks like :

Fig. 13 NeuroPlatform v2 interface.#
To get the overlays of spikes for one electrode, first click on a trace to select it, then go to Tools / Spike Scope :
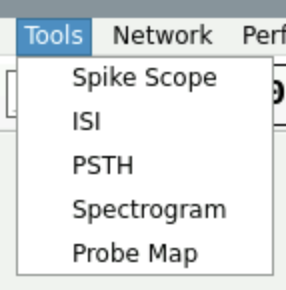
Fig. 14 Path to Spike Scope.#
It will open a new window (see below). Click on ‘Set to Selected’ to see the trace you had chosen before.
Adapt manually the treshold of amplitude value you want to use to detect spikes.
You can also have an idea of the electrode noise by checking the value ‘RMS’ on the top left.
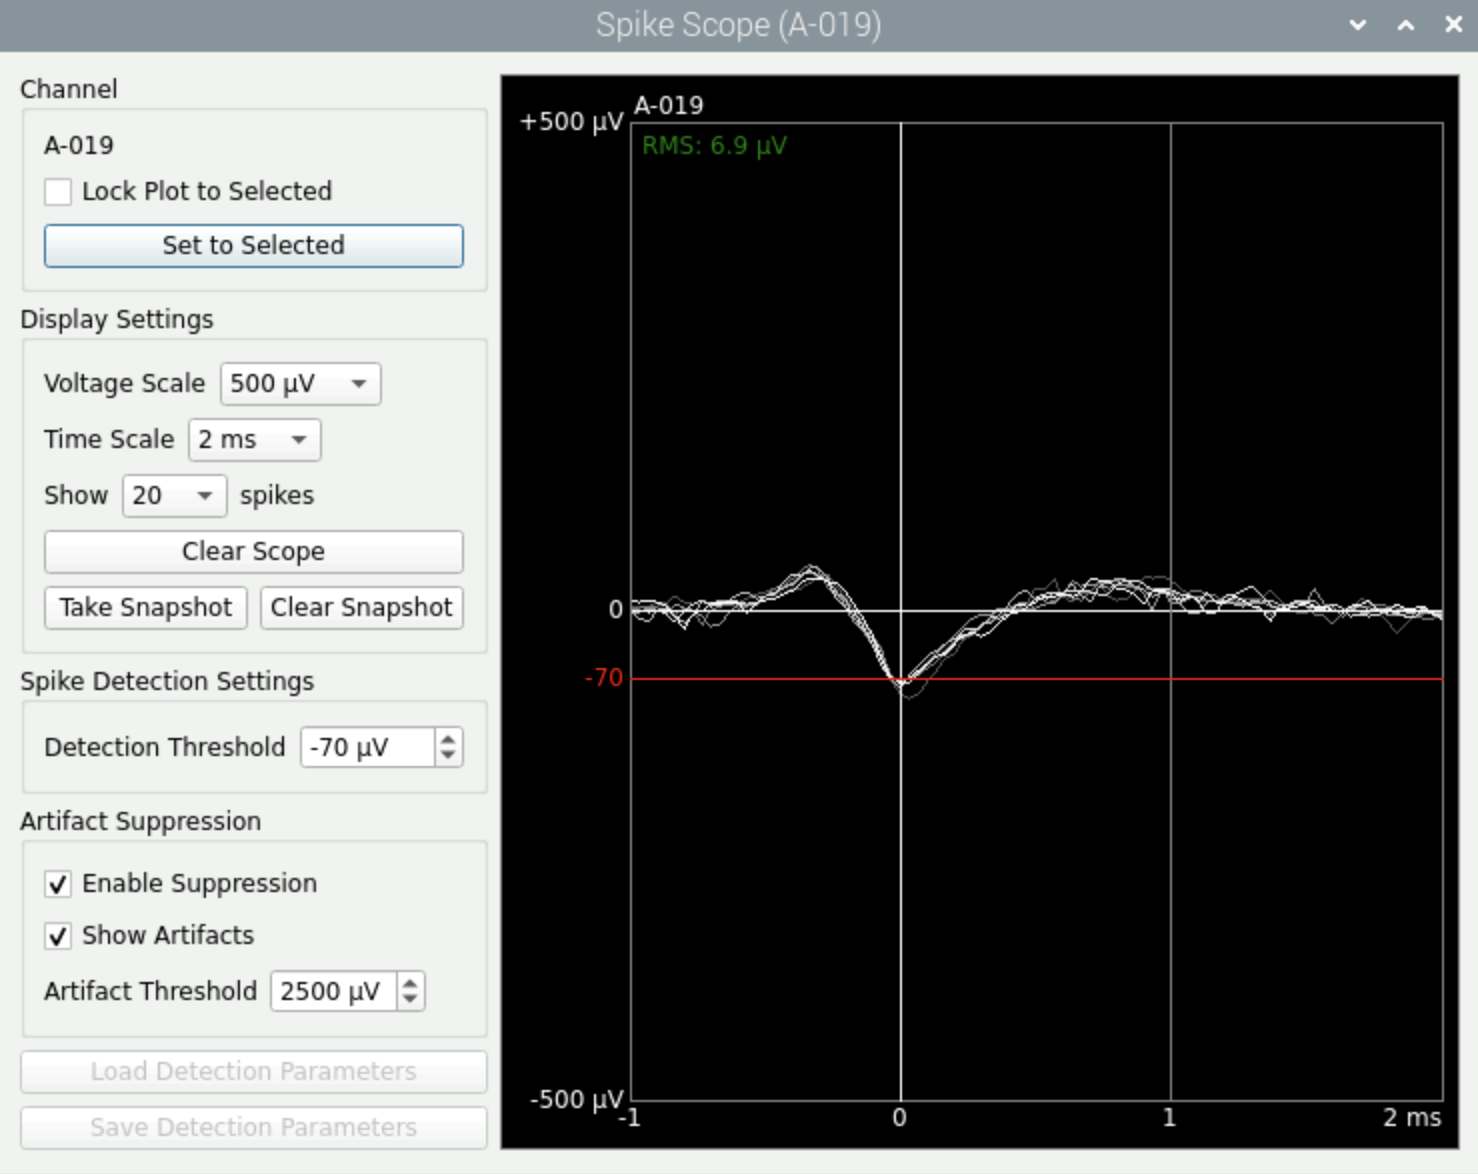
Fig. 15 Spike Scope.#
2- Python Code#
Imports#
%autoawait asyncio
from datetime import timedelta, datetime
import numpy as np
import time
from neuroplatformv2.core.trigger import TriggerController
from neuroplatformv2.core.database import (
    DatabaseController,
    TriggersQuery,
    SpikeCountQuery,
    SpikeEventQuery,
    RawSpikeQuery,
    get_raw_spike,
)
from neuroplatformv2.core.intan import IntanController
from neuroplatformv2.utils.schemas import (
    StimParam,
    StimPolarity,
    StartRawRecordingRequest,
)
from neuroplatformv2.core.camera import CameraController
from neuroplatformv2.utils.enumerations import MEA
import matplotlib.pyplot as plt
Empty shell of an experiment#
Here is the general structure of an experiment. We will see in the next sections how to create stimulation parameters, update them, send stimulations, and disable them.
# 1 - Define the stimulation parameters
# ...

# 2 - Open the intan and trigger controllers
intan = IntanController()
trigger = TriggerController("admin")

# 3 - Start the experiment
try:

    # 4 - Update your stimulation parameters in the intan
    # ...

    # 5 - Send triggers (that use our stimulation parameters)
    # ...

    # 6 - Disable stimulation parameters
    # ...

# 7 - Close the experiment
finally:
    await intan._close()
    trigger.close()
Stimulation parameters#
We need to define the stimulation parameters.
Through Python, you will be controlling the Intan software to set the stimulation parameters.
The software defines stimulations using the elements shown here :
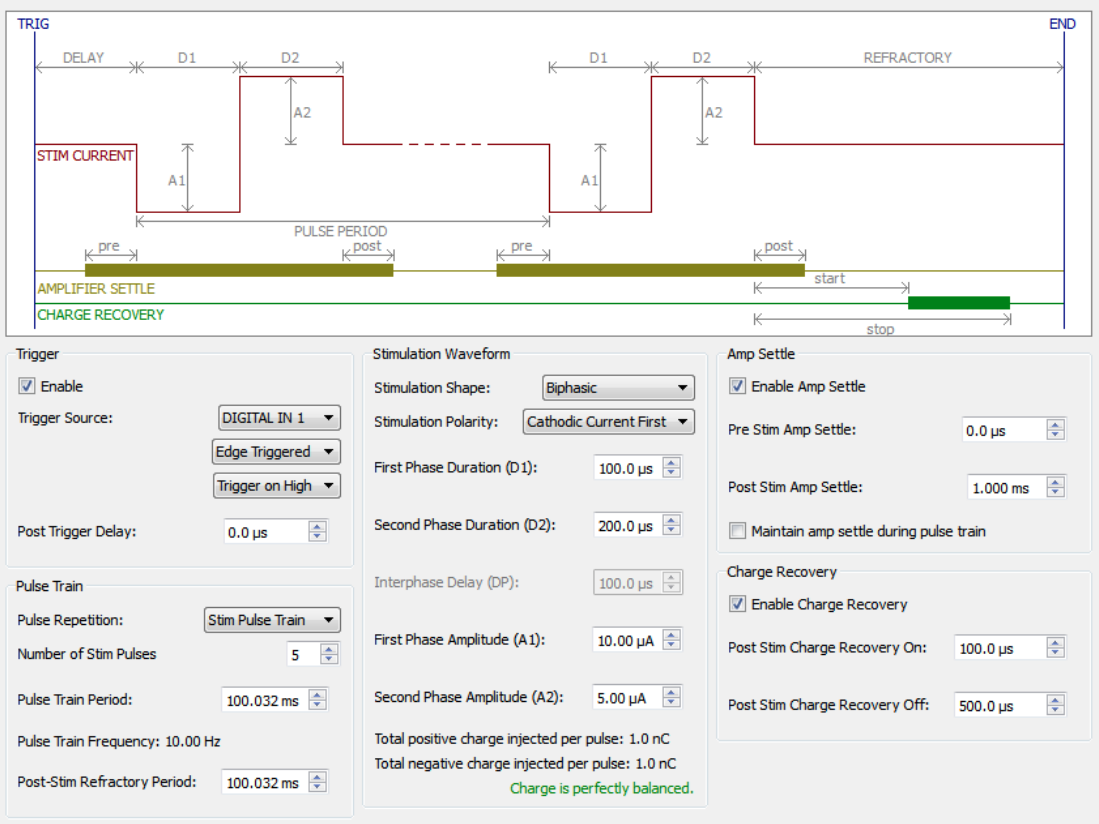
Fig. 16 Stimulation parameters.#
Tip
Feel free to use this as a visual reference when setting your parameters.
Stimulation parameters are defined by several values, such as the amplitude, the duration, and the electrode to stimulate. See below for a detailed explanation of the parameters.
StimParam reference#
Name |
Description |
Default Value |
|---|---|---|
|
Enable stimulation |
True |
|
Electrode index [0-127] |
0 |
|
Trigger key [0-15] |
0 |
|
Polarity of the stimulation |
NegativeFirst |
|
D1 [us] |
100.0 |
|
A1 [uA] |
1.0 |
|
D2 [us] |
100 |
|
A2 [uA] |
1.0 |
————————– |
————————————– |
————— |
|
Stimulation Shape |
Biphasic |
|
Interphase delay [us] |
0.0 |
|
Post trigger delay [us] |
0 |
|
Number of pulses |
0 |
|
Pulse Train Period [us] |
10000 |
————————– |
————————————– |
————— |
|
Post-Stimulation Refractory Period [us] |
1000.0 |
|
Enable amplitude settling |
True |
|
Pre-stimulation amplitude settling [us] |
0.0 |
|
Post-stimulation amplitude settling [us] |
1000.0 |
|
Enable charge recovery |
True |
|
Post charge recovery on [us] |
0.0 |
|
Post charge recovery off [us] |
100.0 |
The first section of the table contains the basic parameters for the stimulation.
You likely will have to adapt these for each experiment.
If possible, balance the charge of the stimulation.
Ensure that \(\text{phase_duration1} \times \text{phase_amplitude1} = \text{phase_duration2} \times \text{phase_amplitude2}\).
This improves the lifetime of both the organoid and the electrodes.
The polarity can greatly affect the response. Please remember to check which polarity is best for your experiment.
The second section contains useful parameters you may want to modify for specific experiments.
The
nb_pulseparameter is useful for burst stimulation.The
pulse_train_periodparameter is useful for setting the period of the burst stimulation.
The last section contains parameters that we recommend leaving as-is.
Please contact us if you have questions regarding the relevance of these parameters for your experiment.
Note
Due to the network-based nature of the communication between components, using Python to time your stimulation (e.g. with time.sleep()) will always be less precise than using the pulse train settings.
However, the pulse train settings may not be changed quickly during the experiment, due to the delay when sending the parameters to the headstage of the MEA.
Therefore, you must choose between flexible spike trains with less precise timing (Python) or precise timing with less flexibility (pulse train settings).
Here is an example of how to create one Stimulation parameter :
stim_param1 = StimParam()
stim_param1.enable = True
stim_param1.trigger_key = 0
stim_param1.polarity = StimPolarity.PositiveFirst
stim_param1.phase_duration2 = 100
stim_param1.display_attributes()
Index : You specify the electrode you want to stimulate.
As mentioned, you cannot use two distinct parameters with the same electrode index. This will overwrite the previous parameter.
Trigger key : You specify the trigger that will be sent to the Intan Controller. The controller can accomodate up to 16 triggers (from 0 to 15).
When you send a trigger, the Intan Controller will execute the parameter(s) associated with that trigger.
Enable : if the parameter is enabled, the Intan Software will record that a given parameter is set for a given trigger.
Then create a list of all the stimulation parameters you created :
stim_params = [stim_param1]
Finally we can update those parameters to the intan (this is necessary in order to use them later) :
await intan._send_stimparam(stim_params)
time.sleep(1)
await intan._upload_stimparam()
time.sleep(10)
At the end of every experiment, disable all the stimulation parameters by changing the ‘enable’ parameter to ‘False’ and updating them in the intan again :
for stim_param in stim_params:
    stim_param.enable = False

await intan._send_stimparam(stim_params)
time.sleep(1)
await intan._upload_stimparam()
time.sleep(10)
Triggers#
The main new concept here is how to send triggers.
When you send a given trigger(s), the TriggerGenerator will send a signal to the Intan Controller to execute the StimParam(s) you set for the trigger(s).
To send triggers, use a 16-length array of uint8 to send the triggers. If the value is 1, the trigger is sent. If the value is 0, the trigger is not sent.
For example, to send trigger 3, we would define the array as follows:
trigger_gen = TriggerController("admin")
trigger_array = np.zeros(
    16, dtype=np.uint8
)  # Here all the triggers are set to 0, so none will be sent

trigger_array[3] = 1  # This will send a trigger to the stimulation with trigger_key = 3

...  # Run experiment ...

trigger_gen.close()  # Close the trigger generator
Example experiment :#
stim_param1 = StimParam()  # Create the stimulation parameter
stim_param1.index = 23  # Associate it to the electrode 23
stim_param1.trigger_key = 2  # Associate it to the trigger 2

stim_params = [stim_param1]  # Put all the stimulation parameters in a list

intan = IntanController()  # Open the intan controller
trigger = TriggerController("admin")  # Open the trigger controller

try:
    start_exp = datetime.utcnow()

    await intan._send_stimparam(
        stim_params
    )  # Update the stimulation parameters in the intan
    await intan._upload_stimparam()
    time.sleep(10)

    trig_array = np.zeros(
        16, dtype=np.uint8
    )  # Create the trigger matrix and set the trigger 2 to 1 (so it is activated)
    trig_array[2] = 1
    for i in range(10):
        await trigger.send(
            trig_array
        )  # Send the trigger matrix (this one has the trigger 2 ativated, and the stim_param1 is associated to it, so it will send the stim_param1 on the electrode 23)
        time.sleep(1)

    stim_param1.enable = False  # Disable all the stimulation parameters
    await intan._send_stimparam(stim_params)
    await intan._upload_stimparam()

finally:
    await intan._close()  # Close the intan and trigger controllers
    trigger.close()
Closed Loop#
If you need to read instantaneously the data from the organoid, you can use the _count_spike function of the intan. It will give you the number of counted spikes for each electrodes during the time interval of your choice.
intan = IntanController()

try:
    # ...
    count_spike = await intan._count_spike(
        100
    )  # Here you just precise how many ms you want to record
    # ...

finally:
    await intan._close()
Database#
Now let’s see how we can retrieve our experimental data.
Triggers#
You can get the list of triggers that were sent to the organoid in a chosen time interval with :
# Choose your start and stop times in datetime
start = ...
stop = ...
query = TriggersQuery(start, stop)
df = await DatabaseController.get_all_triggers(query)
df_trig = (
    df[df["up"] == 1].drop("up", axis=1).reset_index(drop=True)
)  # This lines removes all the duplicates (because df contains all the moments when each trigger went on AND off)
df_trig.head()
Spike Counts#
This gives you the number of spikes per minutes in a chosen time interval for each electrode. To do that, you need to know the ID (fs…) of the experiment you want to study.
query = SpikeCountQuery(start, stop, fsname="fs264")
df = await DatabaseController.get_spike_count(query)
df.head()
Spike Events#
This gives you the timing of each spikes that happened on every electrode in a chosen time interval. Again, you need to know the ID of your experiment.
query = SpikeEventQuery(start, stop, fsname="fs264")
df_events = await DatabaseController.get_spike_event(query)
df_events.head()
Raw data#
You can retrieve the raw data for a specific electrode for a chosen time interval. Remember that we only register 3 ms of raw data around each spike! So the best practice is to first get the spike timing (see Spike Events section right above) and then fetch raw data around it. You can then plot them.
t = df_events["Time"].iloc[0]
start = t - timedelta(milliseconds=1)
stop = t + timedelta(milliseconds=2)

query = RawSpikeQuery(start=start, stop=stop, index=channel)
raw = await get_raw_spike(query)
Camera#
To get a picture of your current MEA :
cam = CameraController(mea=MEA.Five)
lastcapture = await cam._last_capture()
if len(lastcapture) > 0:
    lastcapture = lastcapture.iloc[0]["id"]
    img = cam._image_from(lastcapture)
    plt.imshow(img)